
Once logged into Apteve, navigate to the 'images' tab within the main menu of the CMS.

This will then take the user to the gallery area of the CMS.

Within this area the user can manage the images in the gallery and throughout the site.
Add an Image
To add an image or multiple images to the gallery the user can follow the steps below.
Drag & Drop
This feature allows the user to drag images or files from their computer, into the upload area. The CMS will not resize or optimise when uploading direct to the gallery.
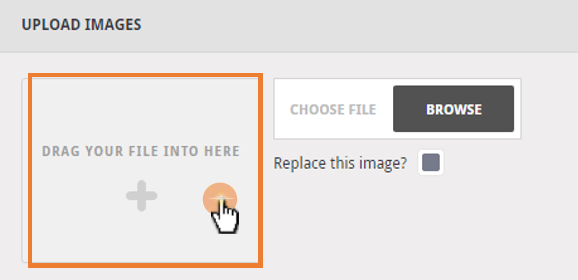
Browse
This feature allows the user to select images from the files off their computer. The CMS will not resize or optimise when uploading direct to the gallery.

Delete an Image
To remove an image that is not being used on the site from the gallery, the user must firstly select the delete option at the bottom of the image file.
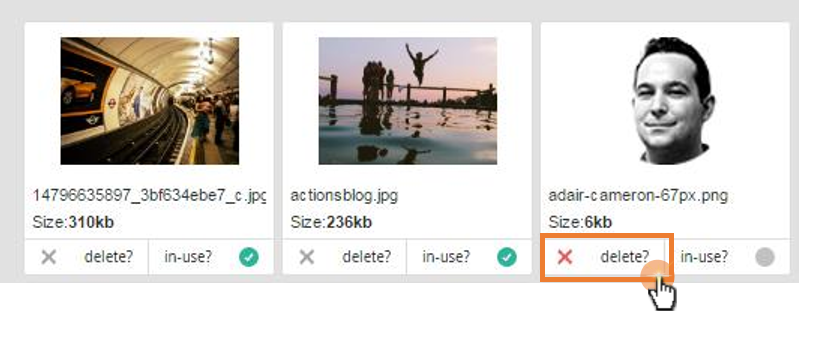 The CMS will then give a final notification to confirm the removal of the selected image from the gallery. The user can either select Yes to remove or No to cancel.
Replacing an Image
Replacing an image allows the user to replace and update a specific image file with the same name to the gallery. This is useful when swapping out or updating an image that is in multiple places across a website.
To replace an image within the gallery, before uploading any new images to the gallery, first select the tick box as shown below.

The user needs to make sure that the image wanting to be updated and the new image have the same name, file type and also that the site is published to see the changes on the live website.