
How To Set Up Thank You Email & Pages
Best practice when a user submits a form on a website is to send them to a Thank You page, send them a Thank You Email or both. This allows the user to understand that their form submission has been received and they can expect a response from you in due course.
In order to set these up it can be a little bit of a lengthy, confusing process but follow the steps below to assist with this.
- Create your Thank You page using a standard text template - usually one from your legal pages will suffice - and change all the relevant information on the page including text, page name and filename. For assistance with cloning a page, see our article on this here
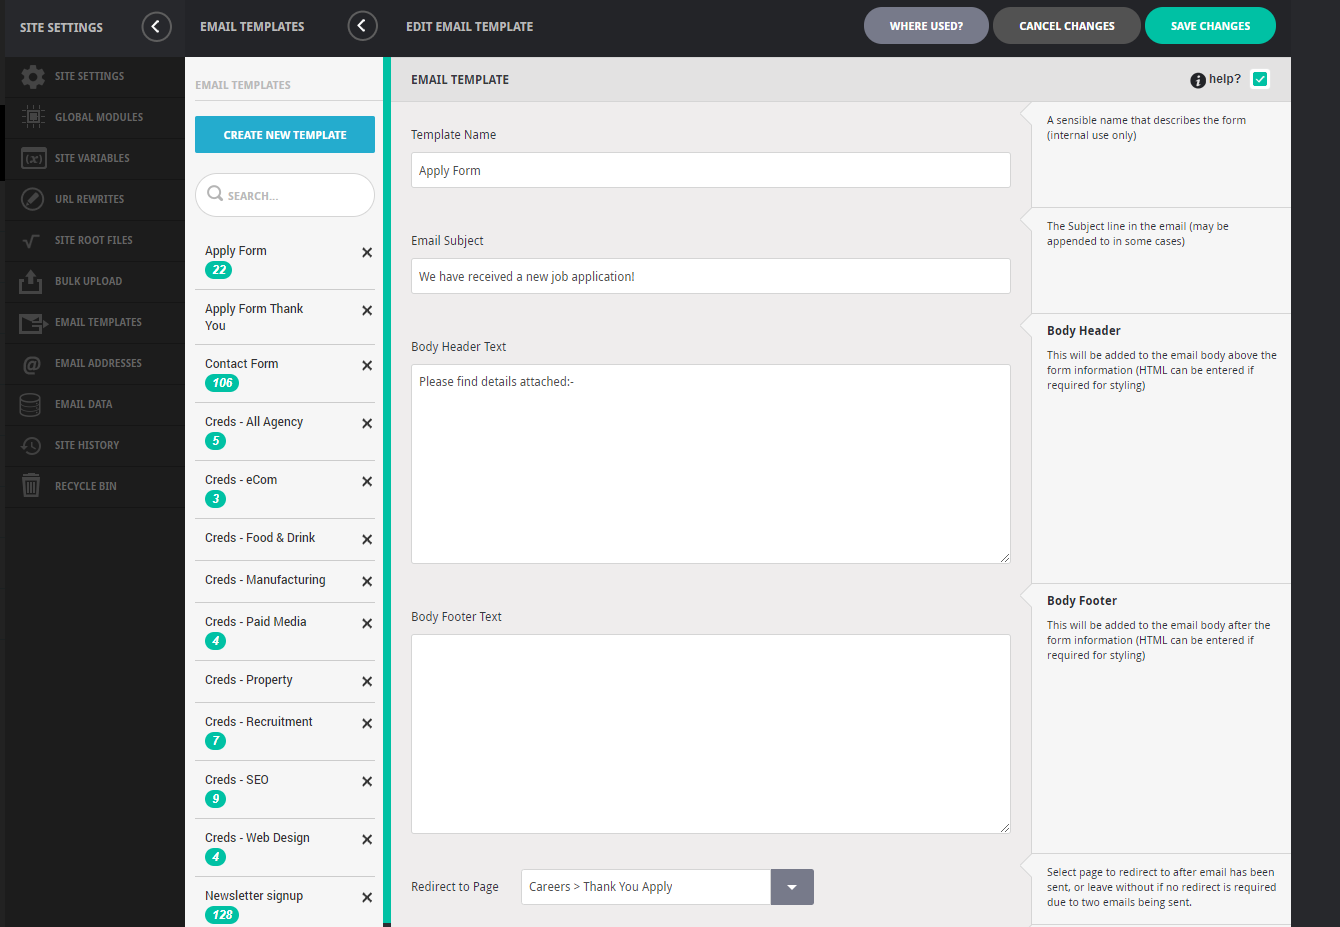
- In Apteve, go to Site Settings then to Email Settings. You should likely see some templates already created in here but each form needs it's own email templates, so you will actually need to create two templates for the new form:
- An internal email to send the form data to you
- A thank you one to send to the user.
- For the internal email, click 'Create New Template' then complete the fields for the template:Template name: This is it appears in Apteve (advice is to add internal or company name to this so it's easy to distinguish from the thank you emails e.g. Apply - Venn).Email Subject: The subject is the subject line that appears for the email.Body Header & Footer Text: In the body/footer fields, you can add the contents of the email - for internal emails you can add a message in and then add 'Data:-' - the contents of the form submission will appear after this.Redirect To Page: Set the redirect to the thank you page you have created and save the template.
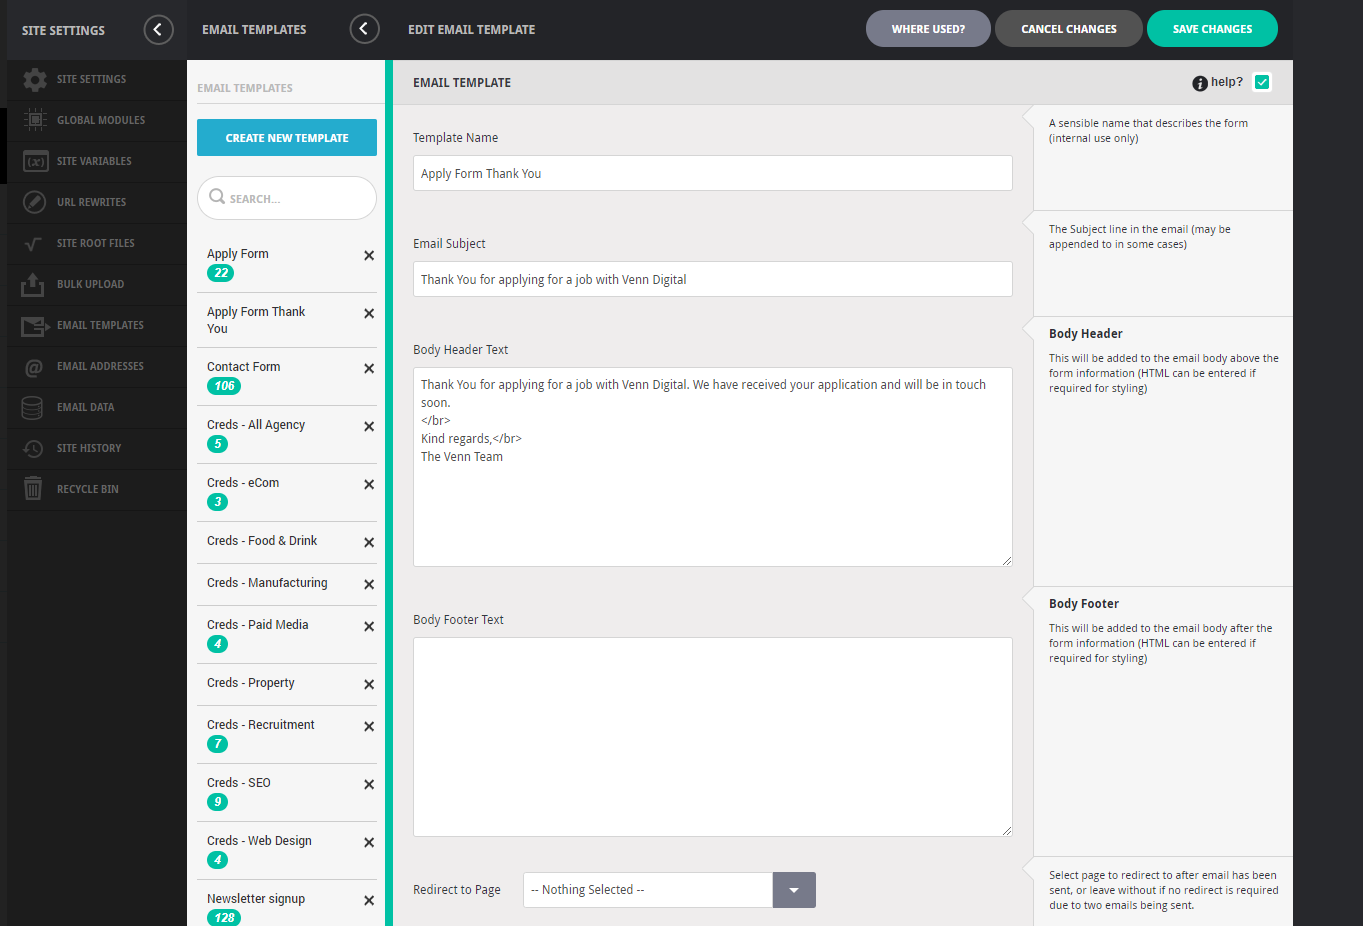
- For the thank you email, follow the same steps above but change the template name to include 'Thank You' and change the content to be what you wish the user to read receiving the email.You do not need to set a redirect to a thank you page for the thank you email if you have already set it for the internal email - only one is required. Save the template.
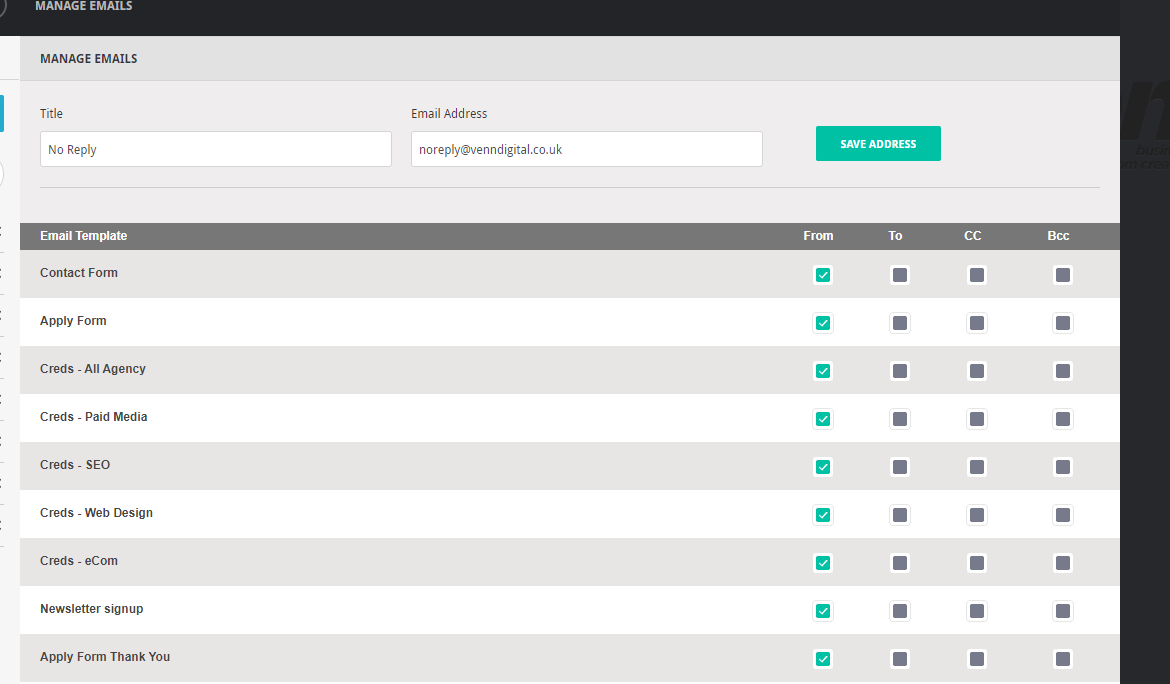
- Go to Email Addresses in Site Settings and then you will need to select a TO and FROM email address for the internal email template. For the thank you email template, you need only select a FROM email address as the TO will be the user's email address they add in the form email field.
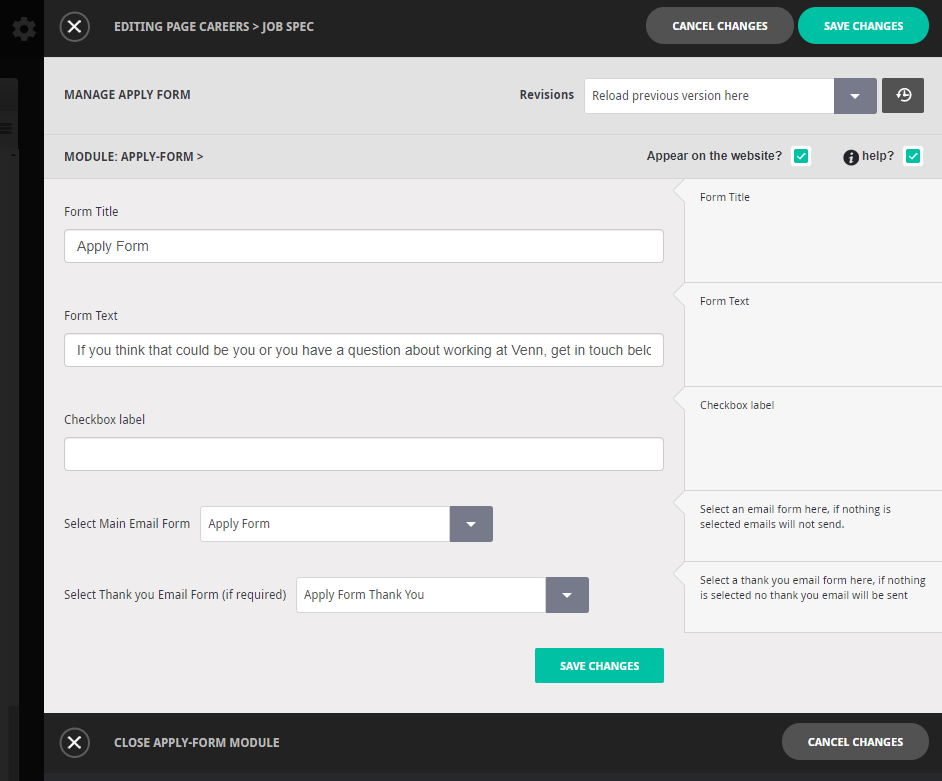
- Now go to the form on the webpage that you were setting up the email templates for - for this I have used the apply form example. Go to edit the form module and you need to select the new email templates you have just created for this form and save changes.
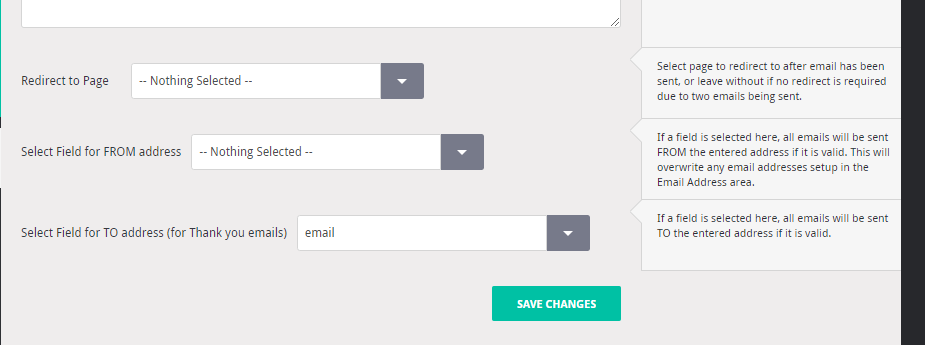
- The final step, you will need to go back into Email Templates and to your Thank You email template you have created. At the bottom of the screen, you need to set the TO address to be the email field on the form so that a user will receive the thank you email. Save changes.
You will then need to publish out the page containing the form you have updated the email templates on and run tests to check that emails are being sent and received.
If you have any further issues with this, please contact our support team for further help at support-ticket@venndigital.co.uk.
*Pro Tip: If you wanted to track the submissions in analytics, you would need to set up a goal with the new thank you page you have created.